
Goal: Increase maximum finger strength
Equipment: Hangboard, range of weights, harness or weight belt, carabiners, daisy chain or accessory cord to attach weights
Frequency: 1-2x per week, 48+ hours between sessions
Intensity: 85-95%
Volume: 4-6 sets, One 10 second rep per set
Rest: 3-5 minutes between sets
The most effective way to build maximum finger strength is the classic max hang training regimen. While there are many variations of this exercise, the principle remains the same: increase maximum finger strength by loading the fingers at a very high intensity. Sounds scary, right? Wrong. A lot of people dislike max hangs because they’re afraid to push their fingers to their limits. They assume that to work at very high intensities is to flirt with injury. This assumption is flawed on two fronts:
- “Very high intensity” is not a fixed load, it’s relative. Remember when you were a kid and people used to ask you how many pull-ups you could do? And you thought that by having a higher number than some other kids, that somehow validated your strength? There was always a number to beat or attain. Yeah, we’re not going to do that. That’s what kids do. We’re going to assess ourselves for our current levels of finger strength, then optimize a plan to increase those numbers.
- Injury is caused primarily by two things: incorrect form and reaching total failure. When performing a max hang, there are a few telltale signs that your fingers (or shoulders) are on the cusp of failing. By understanding and recognizing these signs, we can intentionally train up to that point and no further.
Max hangs are perfectly safe when performed correctly.
You often hear a debate about repeaters versus max hangs and which is better. It doesn’t take much knowledge and experience to put that debate to rest, so let me clear it up right now. They’re both incredibly effective and shunning either is a mistake. The common misconception is that you either do repeaters or max hangs because they’re both finger strength exercises. Doing both is like doing a barbell bench press and a dumbbell bench press, right? Wrong. The “max” in “max hangs” is short for, you guessed it, “maximum.” If you want to increase your maximum strength, you’ve got to work at loads near your maximum strength.
Sounds silly when you say it out loud, right? So why would anyone think the best way to increase maximum strength is to work at very low loads for a long time (a lá repeaters)? Well, because they are also useful for building fitness. They’re just not useful for targeting maximum strength. Repeaters, like max hangs, have a lot of variation. Also like max hangs, those variations operate on a similar principle: increasing finger strength-endurance by working at sub-maximal loads for many repetitions. So, max hangs build maximum strength and repeaters build strength endurance. Sure, they’re both technically “strength” exercises, but they work on opposite ends of the intensity spectrum and therefore produce different results.
Get strong with max hangs, get “fit” with repeaters.
So let’s talk about how to get strong for now. First, I’ll talk about how to properly execute a max hang, then I’ll get into how to apply it to your training.
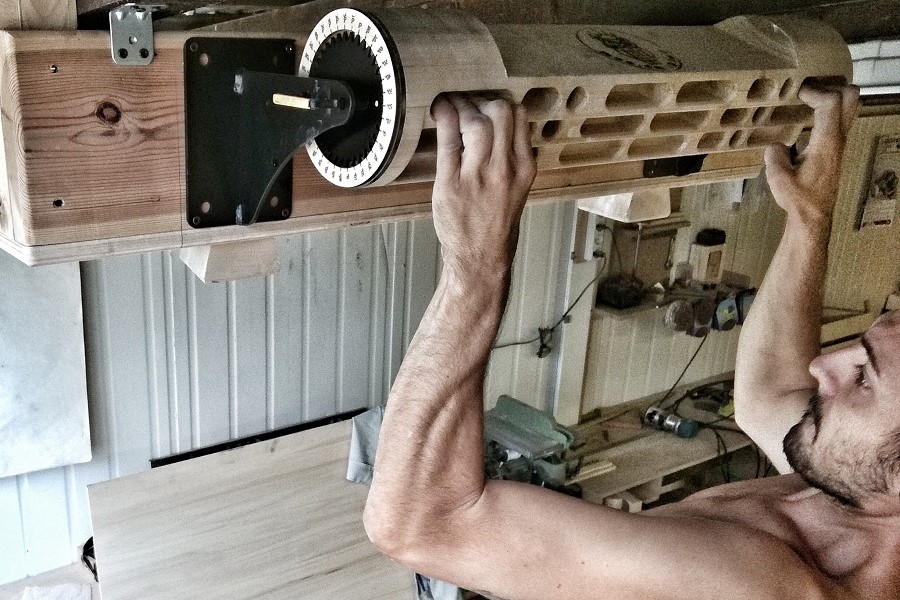
Form
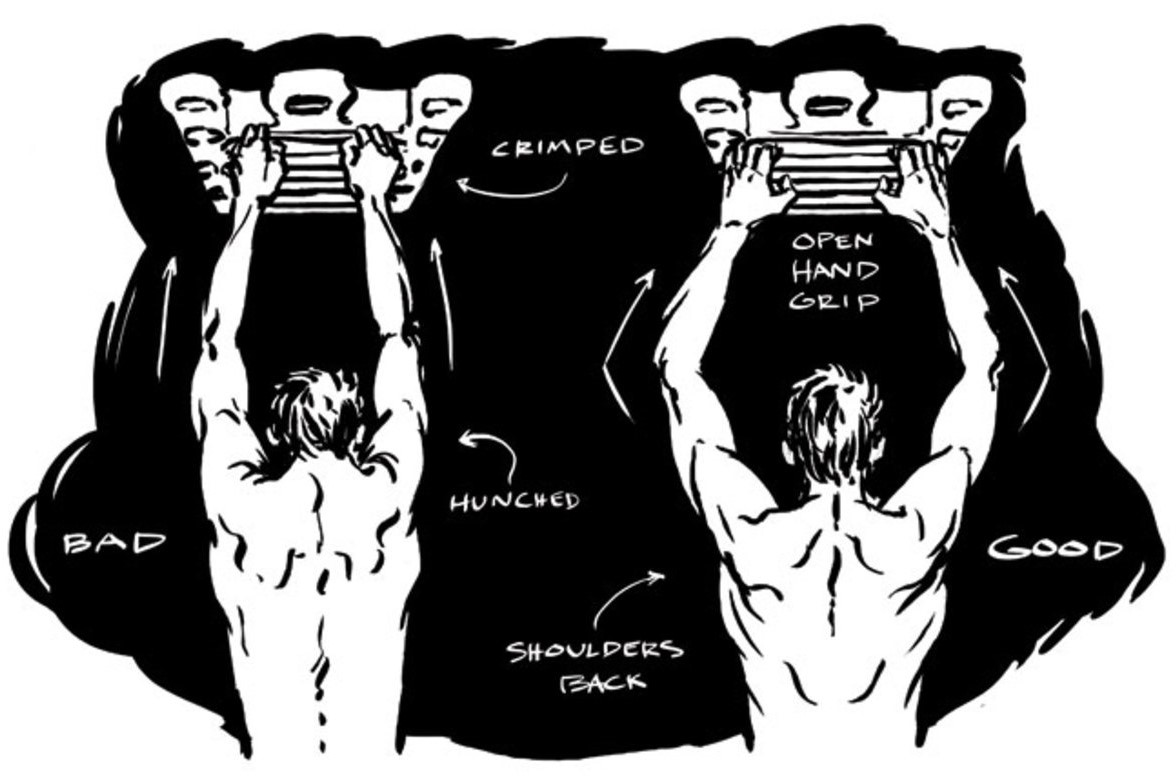
The biggest and most common mistake I see with hangboard form is hanging on disengaged shoulders. I think a lot of people do it for two reasons: most of the hangboard literature available is written for people who already know how to hangboard, so discussing proper form is an unnecessary encumbrance; hanging on disengaged shoulders is physically easier because it allows you to take weight off your muscles and put it onto your bones. This is extremely dangerous for the many tendons and ligaments that comprise the human shoulder.
To properly engage your shoulders, think about being in the bottom position of a pull-up, about to start pulling yourself up. Keep your arms straight, a slight bend in your elbows is fine if it feels more natural, but don’t go anywhere near a 90 degree bend. Don’t pinch your shoulder blades together, but allow your shoulders to roll slightly outward and downward. You will probably feel more tension in your shoulders than anywhere else during max hangs. Fire up your core to keep your torso rigid and rotated slightly internally (think about what it feels like when you plank). A good learning cue is to actively try to keep your shoulders away from your ears.
Funny side note: I don’t actually know how strong my own fingers are, because in my personal experience with max hangs, my shoulders always fail well in advance of my fingers.
Edge Size
18-22 mm is ideal for max hangs. Whatever you pick, stick with the same edge for the entire cycle. An effective strategy for changing up the training stimulus is to do one cycle on an 18-22 mm edge, followed by one cycle on an 10-15 mm edge.
Grip Positions
When training for maximum finger strength, the grips to consider are the half crimp, open crimp, and full crimp. I’m not saying train all of them, simply consider all of them. I generally never advise training the full crimp position for one primary reason: it’s the most dangerous grip due to excessive force being placed on the DIP joint (the knuckle closest to the fingertip). The benefits of full crimp position training are too small to be worth the risks, and most climbers simply don’t need it. This isn’t to suggest that you should never use a full crimp when you’re climbing, as it’s usually the strongest grip in your climbing arsenal. I simply advise against using it on the hangboard.
The half crimp is going to be your go-to grip on the hangboard. It should be the subject of most of your training attention. The reason being: hangboarding is an isometric exercise (no muscle movement, static loading) and isometric strength training increases strength in a range of positions 15 degrees from the range used during the exercise. Basically, by getting a stronger half crimp, you’ll also get a stronger open crimp and full crimp. The half crimp is going to offer the biggest return on investment. I’ve done several training cycles using only this grip and it’s been effective.
The open crimp activates some slightly different muscle fibers in the forearm than the half crimp, making it a worthwhile grip to train as well, particularly if there is a noticeable disparity in your strength between the open and half crimp positions. In an ideal scenario, I suggest training the half crimp one day and the open crimp on a separate day. You don’t want either grip to be much stronger than the other, so if you’re fairly balanced already, this type of finger training split is probably the way to go. If you’re lacking strength in either position (probably the half crimp for most climbers), train only that position for a cycle and see where you’re at afterwards.
What about pockets and slopers? In my opinion, they’re a waste of time. Slopers are the most egregious offenders of wasting time because sloper strength is a function of two things: open crimp strength and friction. You can’t train friction (it also varies wildly day-to-day), so train what you can: the open crimp. Just let the sloper strength follow naturally.
The reason I don’t train pockets is a bit more complicated. When your fingers are in a pocket, you’re not just bearing down on the lip of the pocket, you’re also getting some friction assistance from one or both sides of the pocket, which does nothing for you but create the illusion that you’re stronger than you are. Furthermore, I see pockets as a “goal-specific” grip that shouldn’t be trained unless your goal route/boulder is riddled with pockets. Why would you want some of your fingers to be stronger than the others if all you’re seeking is a generally stronger grip? Lastly, pocket strength is ultimately a function of open crimp strength, just using fewer fingers. I do believe that training single finger strength, finger by finger, has merit but shouldn’t be focused on by most climbers. The fact is: you’re going to get strong on pockets and slopers just by training the two main grip types (open and half crimps). If you must train pocket strength, I recommend using a regular edge on the hangboard instead of an actual pocket to avoid friction assistance.
Failure
When training max hangs, we’re going to train to failure, but not total failure. Earlier, I talked about training to “signs of failure,” so let me now explain what those are.
Losing shoulder engagement is the ultimate no-no.
Do not ever allow yourself to collapse onto disengaged shoulders for the sake of eking out a few more seconds on the hangboard. If the shoulders start to go, consider the hang complete.
Changes in grip: If you’re using a half crimp, your fingers may begin to peel open into an open crimp. If this happens, the hang is done. If you’re using an open crimp grip, you may open even further into a three-finger drag (pinky comes off). This is also a sign of failure.
Work up to these points, and absolutely no further, to get the most out of your max hangs. You shouldn’t fail on the first few sets, but you may reach failure on the last set or two.
Loading
When training a max hang, we want to be using about 85-95% of our maximum strength. There are a few different ways to figure out what that number is, some are more scientific than others. Some people like to use math to calculate a theoretical maximum, but I prefer a slightly less scientific and slightly more practical method. A surprising amount of factors go into a max hang that simply can’t be accounted for (friction conditions, energy levels, mid-hang form corrections, initial overloading, etc.). Therefore, I prefer working off practical numbers as opposed to theoretical ones. The truth is, while I maintain that they’re completely safe, max hangs are still likely to be the most dangerous training activity for most people. It’s better to err on the side of using slightly too little weight because it’s what you can reliably manage in a practical scenario than to really push yourself to meet your theoretical potential. With that in mind, here’s how I suggest calculating your load for max hangs:
The protocol is to complete 13-second hangs at increasing weight until you reach a weight that causes failure in 10-13 seconds. Plan to rest 3-5 minutes between each and every hang, and attempt to find the correct weight within 6 attempts.
After a thorough warmup, pick one grip type to assess and stick with it. Avoid using different grip types on the same day, as it’s too hard on your fingers to get accurate results. Do your first hang at a weight that you are certain will not only be possible, but easy. Whatever you think your max weight might be, start at around 40% of that. Bodyweight hangs are generally a good place to start for most climbers. Use your first hang as a gauge for how you’re feeling, and add additional weight based on your perceived limitations. Your goal for the second hang should be a slightly more difficult hang with more weight, but should not be your max limit. The goal of the third hang should be a conservative estimate of what you think will be your final weight: if you think you may end up adding 50 pounds, try 40-45. Your fourth hang should be a minor overshoot: you’ll want to reach failure before 10 seconds, but not by much (maybe ~7 seconds). This is going to establish a range of weights that must include the correct one. Use your fifth hang to narrow it down even more, and your sixth hang to hit the perfect weight.
Once you have found the weight that causes failure in 10-13 seconds, you’re done for the day. Why? Because you’ve already done enough hard hanging for one day; adding more won’t make you stronger, it’ll just dig a deeper recovery hole for you to crawl out of. The good news is that you’ve found the weight you’re going to use for the next 3+ weeks.
Alternatively, if you’d rather go the mathematical route, you can test yourself using hangs of 7 seconds. Take whatever weight you end up with, including your body weight, and multiply it by 0.9. That’s going to be your working load.
Example:
150lb (68 kg) climber can just hold proper form with 20 lbs (9 kg) added for 7 seconds would want to train adding 3lbs.
(150 + 20) x 0.9 = 153 lbs (1.5 kg)
Sessions
Max hang sessions are so simple that the hardest part is forcing yourself to rest as much as required for recovery. All you’re going to do, after a full body warm up, is a couple of easy warmup sets to get your fingers used to supporting loads above your body weight and contracting for 10 seconds at a time. After this, it’s on to the work sets. One work set is a single hang of 10 seconds using the weight you determined during your assessment session. You’ll do 4 to 6 sets of this, resting 3 to 5 minutes between set. That’s right: 3-5 minutes of rest between bouts of 10 seconds of work.
It’s even more boring than it sounds, but it’s damned effective.
So how many sets exactly? I like to start with 4 and progress by adding a set after every two sessions. You’ll do 2 sessions at 4 sets, 2 sessions at 5 sets, and 2 sessions at 6 sets. You’ll achieve progressive overload by adding to your total time under tension without changing the working weight or hang duration. Simplicity itself.
Programming
Lastly, I’ll talk about how best to program max hangs. There are certainly exceptions to everything I’m about to say, but I’m going to speak in ideals here. This article is about “max hangs,” not “max hangs… and everything else.” Let’s save that for a future article.
Max hangs are a high intensity sport-specific exercise, so they shouldn’t immediately precede or follow another high intensity with the same sport-specific work. They deserve their own session with their own warm-up and cool-down. If you want to build serious finger strength, do two sessions of max hangs per week, and separate those sessions by at least 48 to 72 hours. Avoid hard climbing between these sessions and focus on recovery rather than “getting another workout in.” Very low intensity climbing, like ARCing, is fine and perhaps beneficial. If you just want to maintain your finger strength and potentially improve it, one session per week is sufficient.
Once you’ve completed a full cycle of max hangs (3 weeks if you’re doing two sessions per week, 6 weeks if you’re doing one), take a “rest and reassess” week. Rather than continuing to train your max hangs, reassess your working weight and repeat the entire process. Only do this one session during this week. Let your body recover and prepare for the next cycle.


