
This guide provides an introduction to climbing anchors and the SERENE method. Although anchoring is an essential component of the technical climbing system, a well-built anchor alone cannot fully protect you and your partners from all falling hazards. As a result, we highly recommend taking an anchor-building course from an AMGA-certified guiding service before implementing these techniques.
Introduction to climbing anchors
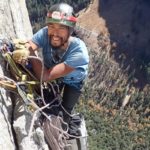
At the most basic level, a climbing anchor is composed of pieces of climbing gear set up to support the weight of a belayer and/or climber. An anchor is an important component of top-roping, rappelling, sport climbing, leading traditional routes, and multi-pitch belay stations.
SERENE anchor systems
While specific anchor building requirements vary from climb to climb, the same basic anchoring principles are shared by all styles of roped climbing. These simple, yet highly effective guidelines can be summarized by the acronym S.E.R.E.N.E. Let’s break it down:
S – solid
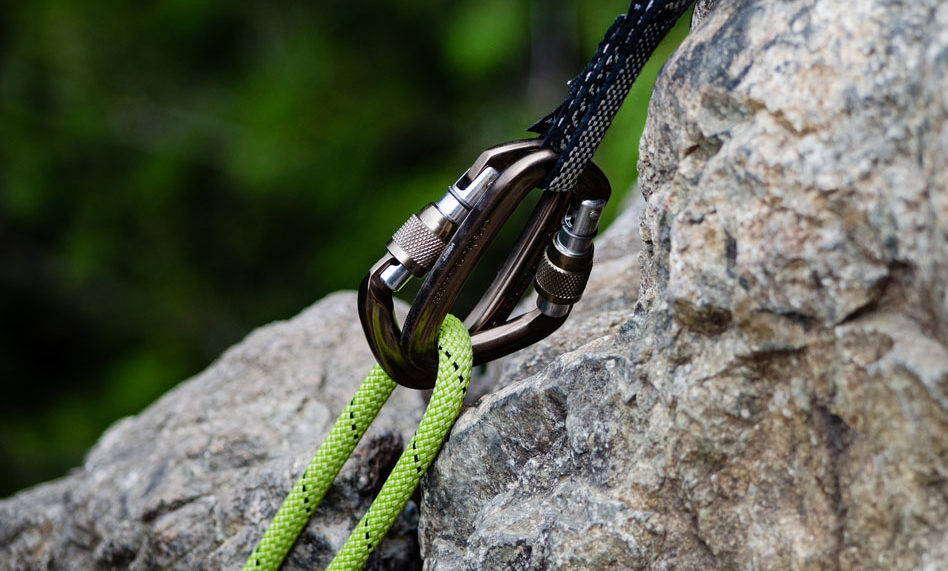
Each individual piece that makes up the anchor should be solid to the greatest possible extent. This “piece” may be a bolt that has been placed at the top of a climb, a tree or boulder for natural protection, or a cam or nut placed in a crack. While it is not always possible for every piece of a climbing anchor to be placed to withstand high loads, it is important to try to achieve the strongest placements possible. An AMGA-certified guide will be able to help you learn to distinguish between an adequately strong and a marginally solid point in a climbing anchor.
E – equalized
Sometimes, it isn’t possible to build an anchor so that each piece can individually withstand high loads. Building an anchor system so that the load is distributed to all of the individual components decreases the chance that any one component will fail.
R- redundant
All components of the anchor should have a backup, so that a single point of failure does not result in the catastrophic failure of the entire anchor. If a protection point fails or any part of the system is cut, there must always be another part in the system to take the load. Common examples are two bolts at the top of a sport climb and three or more pieces of active or passive trad gear at the top of a trad climb.
E – efficient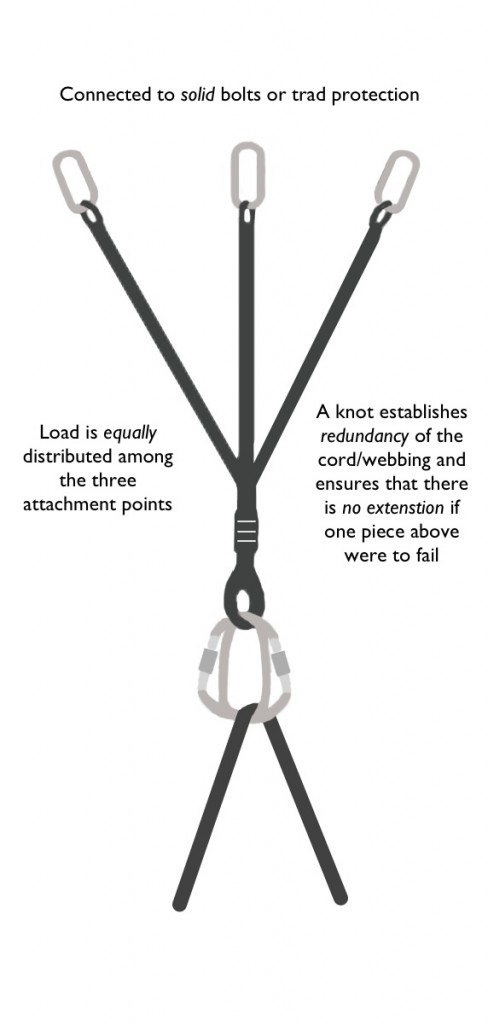
“Efficiency” in anchor building doesn’t refer to rushing; rather, it refers to attempting to find a simple, timely solution to the problem at hand. Keeping things simple (efficient) will save time and make it easier for the system to be evaluated for safety as a whole. On a long route, if it takes 15 minutes to build every anchor, that can add a lot of time to your day on the wall.
NE – no extension
If a component does happen to fail, the anchor system should be constructed in a manner that attempts to eliminate shock-loading of the remaining components. If there is slack in the system before (or as a result of) a piece failing, there will be a severe load directed to the other piece(s).
Additional comments about equalization
Using accessory cord, rope, or webbing is a common way to connect anchor points together to equalize them and create redundancy. Intuitively, you might think that the two anchor points will always take 50% of the load when equalized. In reality, the geometry (or “v-angle”) of the system will determine how the load is distributed.
As angles increase, so does the force applied to each anchor point. When the angle exceeds 120°, each of the anchor points will experience a greater force than if equalization wasn’t used at all.
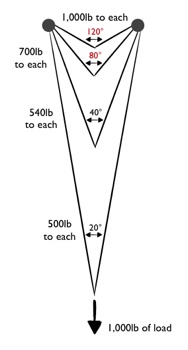
For the sake of simplicity, the AMGA recommends keeping this angle under 90° at all times. The smaller the angle, the better.
Moving beyond the acronym
While using the SERENE acronym is a good starting point for learning to recognize a well-built anchor, it is not a substitute for judgment-based decision making. When preparing to build an anchor, make sure to first take a moment to analyze your environment and the situation. Then, craft an appropriate and efficient solution to the specific problem at hand. Being able to do this well will come through experience.

